fbpx

Ideal Temperatures for Storage When Organizing Your Home

Picture of a storage closet

Maybe your New Year’s resolution is to get your home organized and clear the clutter.  You may not realize it, but storing away cherished family photos, heirlooms, and other important items in the garage or attic may not be the best idea.  Many of us are guilty of just cramming things in a closet or anywhere that’s convenient at the moment, thinking we will organize it later.  
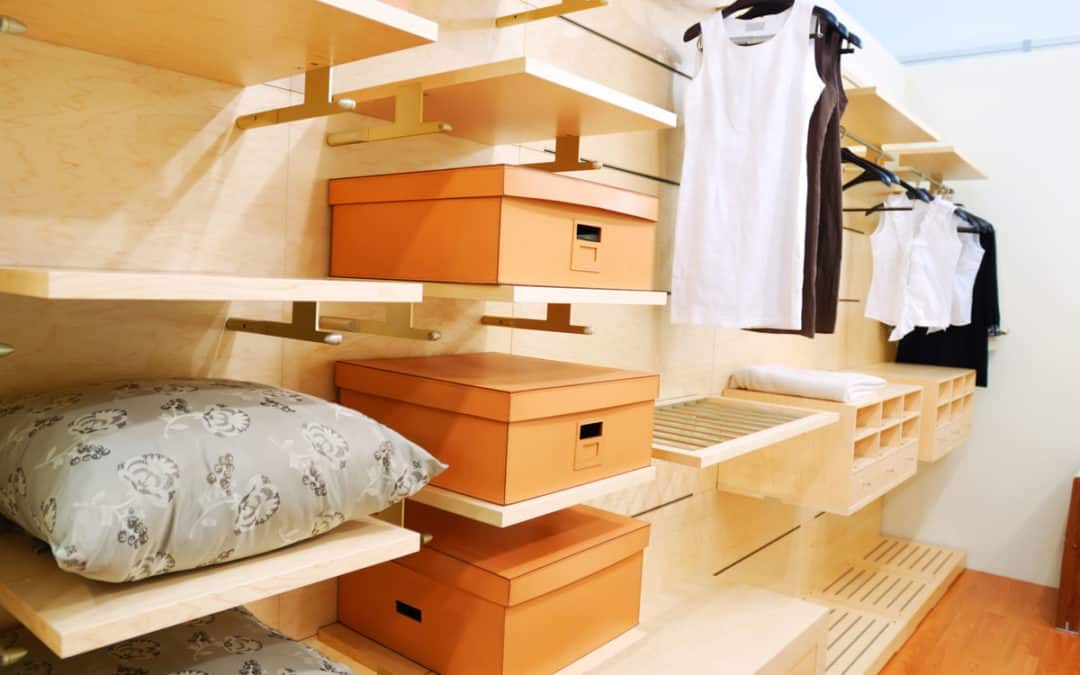
When storing and organizing your home, the temperature should be taken into consideration to protect from possible damage.

Of course, totes and boxes make it easier to organize your home, but this isn’t enough.  Here are some tips that will help you keep your New Year’s resolution.

Holiday decorations.  Many homeowners have decorations for every season.  You want to be able to use it each year, so protecting it is vital.  Bubble wrap is good to protect from breakage, and placing your decor in a plastic tote protects from rodents, bugs, moisture, etc.  A damp basement isn’t the best place for storage, so make sure you put away your bins in an area that isn’t susceptible to significant temperature or humidity fluctuations.  Label your totes so you can easily find what you need next time.

Photos and artwork.  Whether old family photos, valuable paintings, or those cherished pieces of artwork your children have created over the years, storing these items at the proper temperature is critical to preserving them and protecting from damage.  Clear plastic totes protect from moisture and dust, and temperatures ranging between 70 and 75 degrees are ideal.  You will also want to keep humidity levels at about 50%, as too much moisture can cause your photos to stick together.  If you have several paintings, use racks to separate them when stacking to protect from potential damage.

Clothing.  Storing your clothing in a dark area away from sunlight is essential to keeping your clothes looking new year after year.  Before putting away in a cabinet or on a closet shelf, wash the clothes you will be storing and make sure they’re thoroughly dry.  Avoid extremely hot or cold temperatures, and aim for about 50 to 55% humidity levels to protect from dampness.

No matter where you intend to store your clothing, artwork, holiday decor, or other items you’re putting away to get your home organized, a ductless mini-split system will help ensure the perfect temperature and humidity level.  Contact Haley Mechanical today to learn how these systems could transform your shed, basement, or garage into the ideal storage space.

Learn more about Indoor Air Quality options.

How Often Should Boilers Be Serviced?

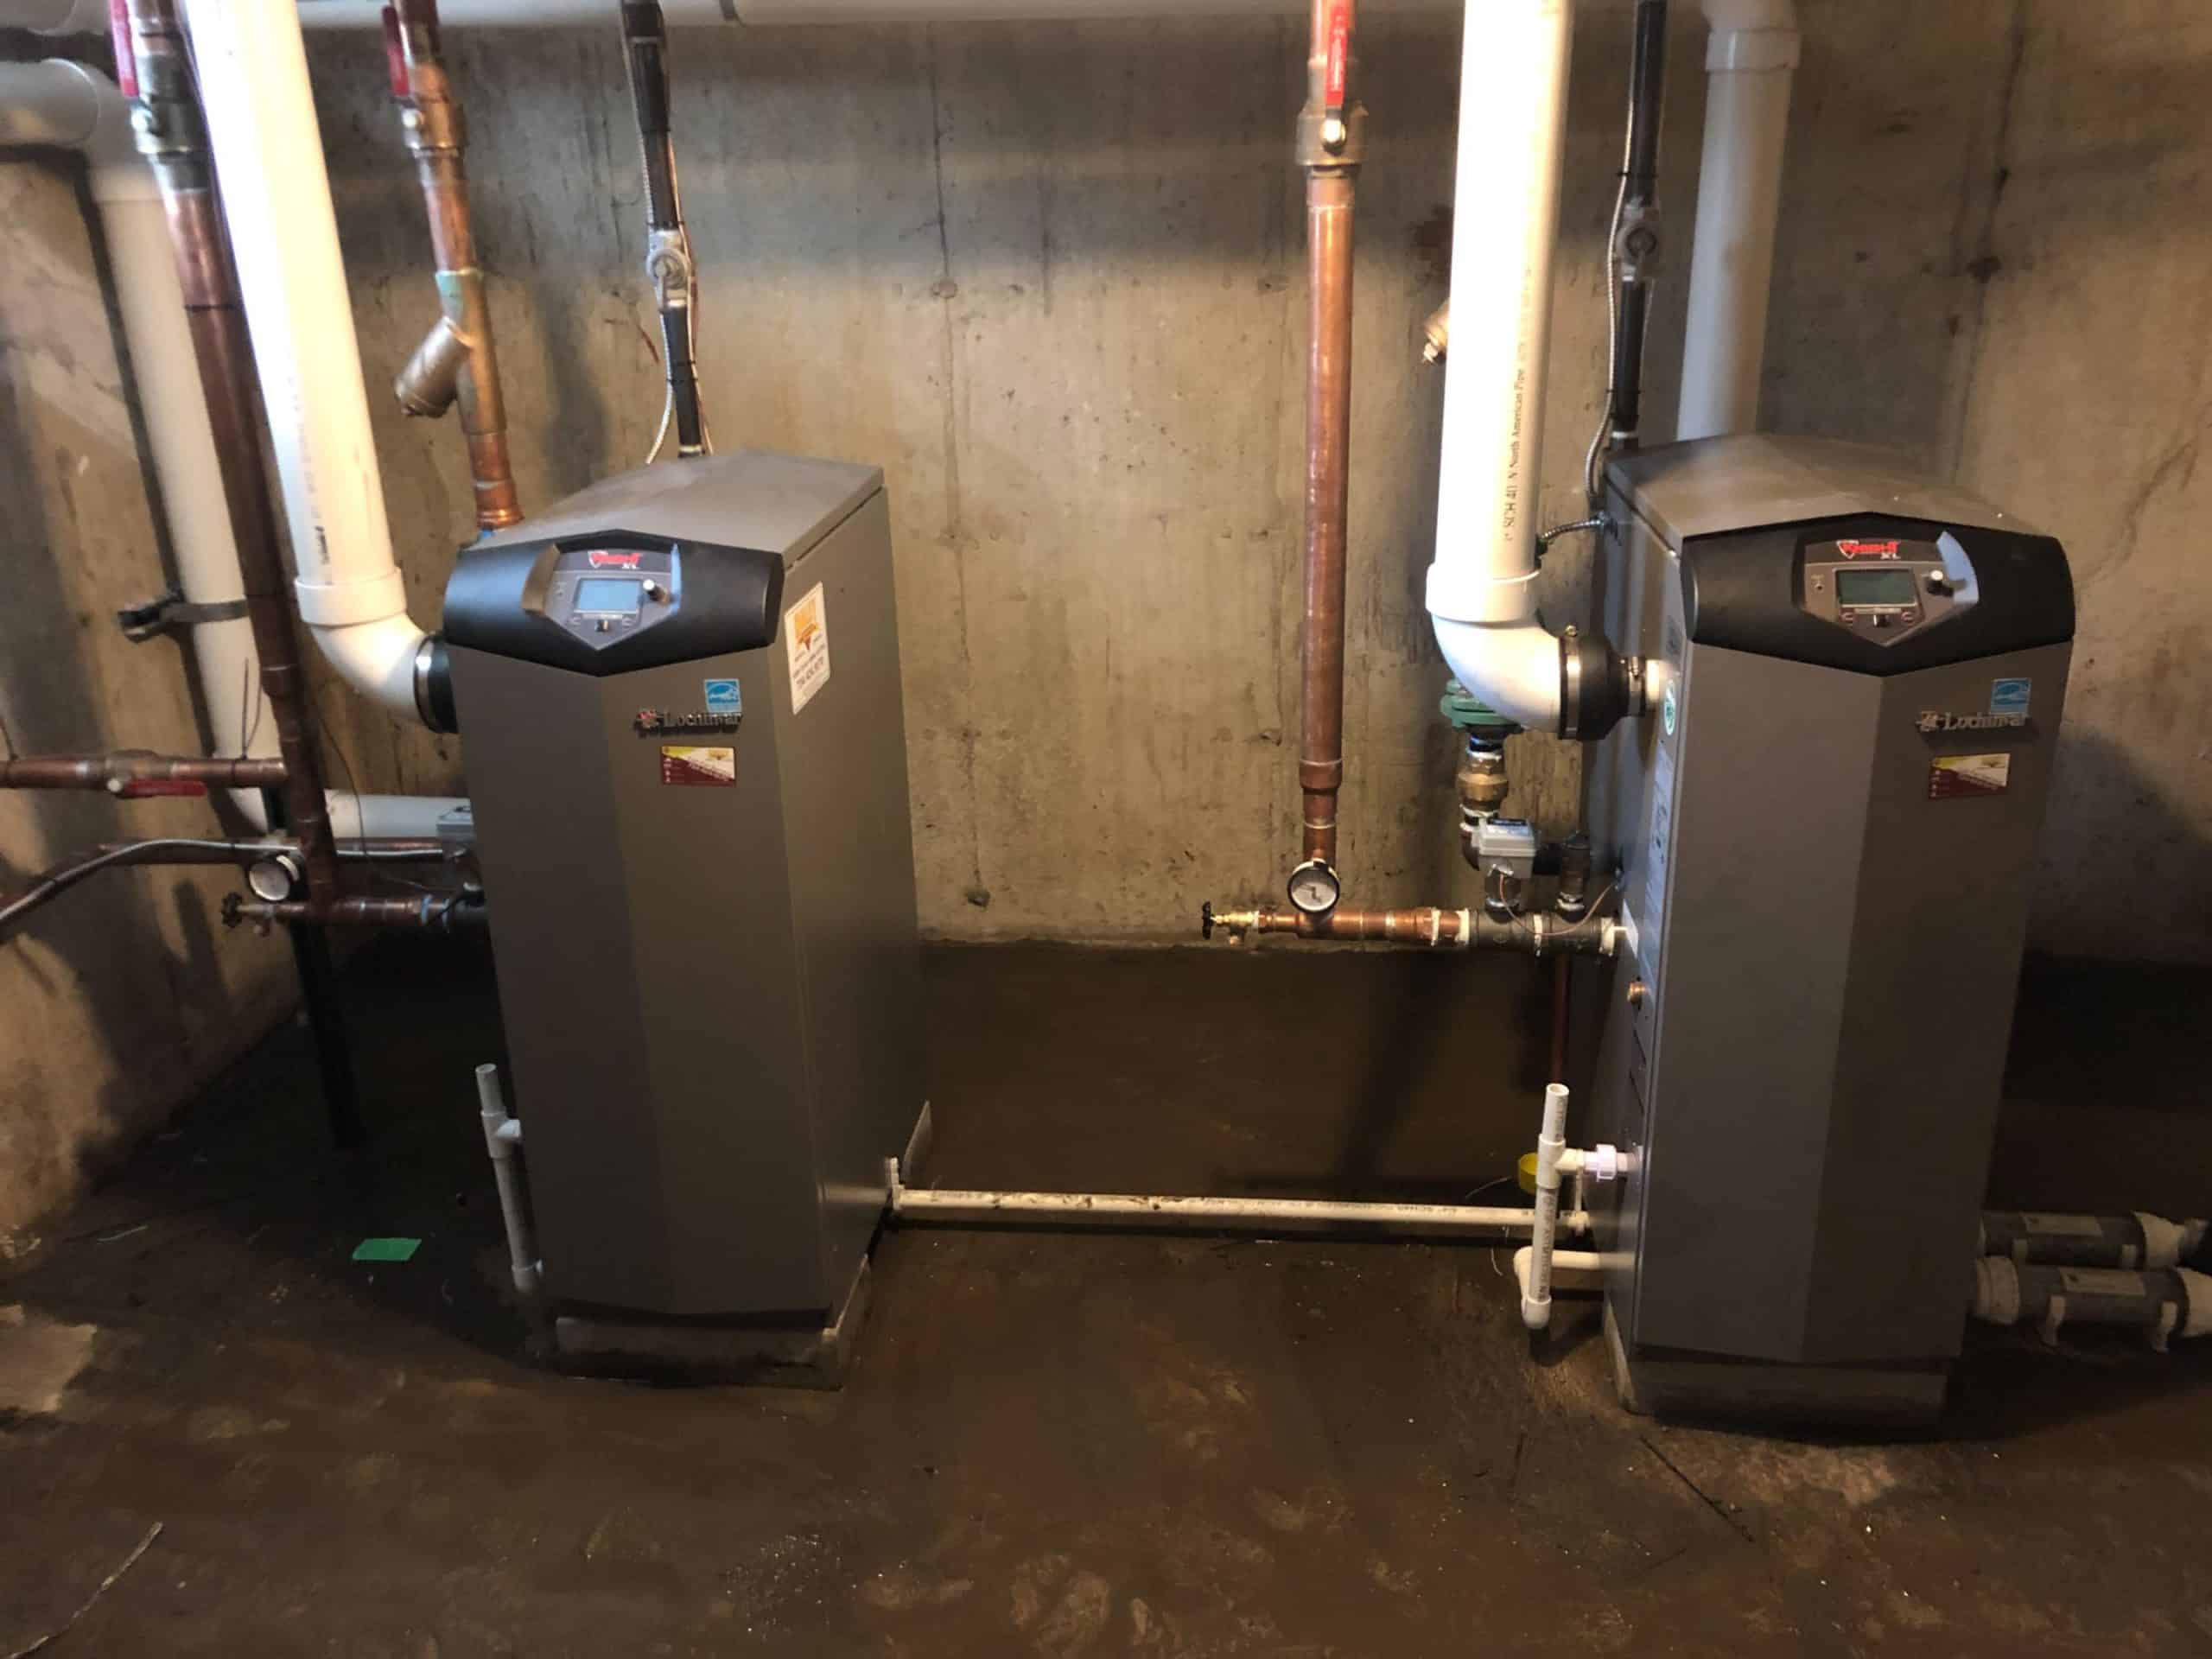
How often should boilers be serviced? This is a question many Southeast Michigan homeowners don’t know the answer to. While your boiler should be maintained regularly, does that mean each year, each month, or what exactly? Our boiler and heating professionals have the answers you are looking for.

How Often Should Your Boiler Be Serviced?

Your boiler should be serviced each year, which is sufficient to limit wear and ensure it functions properly. Additionally, having your boiler serviced annually will keep the warranty valid in most cases. Your home insurance may not cover any issues in some cases if you fail to have your boiler serviced every year.

Moving to a New Home?

When you move to a new home, you may not be sure when the previous owner had the boiler serviced. To protect against any potential problems, have the boiler serviced so that you know for a fact it is done and can schedule annual servicing from that point forward.

Is Your Boiler Running Inefficiently?

A boiler that seems inefficient could indicate serious, more costly problems. While this isn’t always the case, at the very least, the lack of efficiency is resulting in higher operating costs. If it’s been longer than a year or your boiler isn’t functioning as it usually does, have it serviced.

Summer and Fall are the Ideal Times to Schedule Service

The cold winter months are when you use your boiler heavily, so the best time to have annual service is during the “off” season when technicians typically have a lighter workload. Boiler repair & maintenance technicians will be able to get to you sooner rather than later, and you will be set for the winter season knowing your home will be warm and toasty. July or August is a good time to schedule a boiler service.

Don’t Put Service Off Until You Experience a Problem

Homeowners often put boiler service off when things seem to be humming along; after all, if it isn’t broke, why fix it? You may think you’re wasting money by having your boiler serviced when it’s operating efficiently, but waiting until it isn’t working as well will likely cost more than just having it maintained each year. Don’t put it off – have your boiler serviced each year.

Schedule Your Yearly Boiler Service Now

Perhaps you aren’t sure when your boiler was last serviced, or you didn’t have it done over the summer months. Now that you know how often boilers should be serviced, make an appointment now, before temperatures get colder in Ann Arbor and surrounding cities in SE Michigan. Call Haley Mechanical today for friendly, fast, reliable service.

The Benefits of Owning a Geothermal System in Ann Arbor, Michigan

Geothermal Repair in Ann Arbor, Michigan

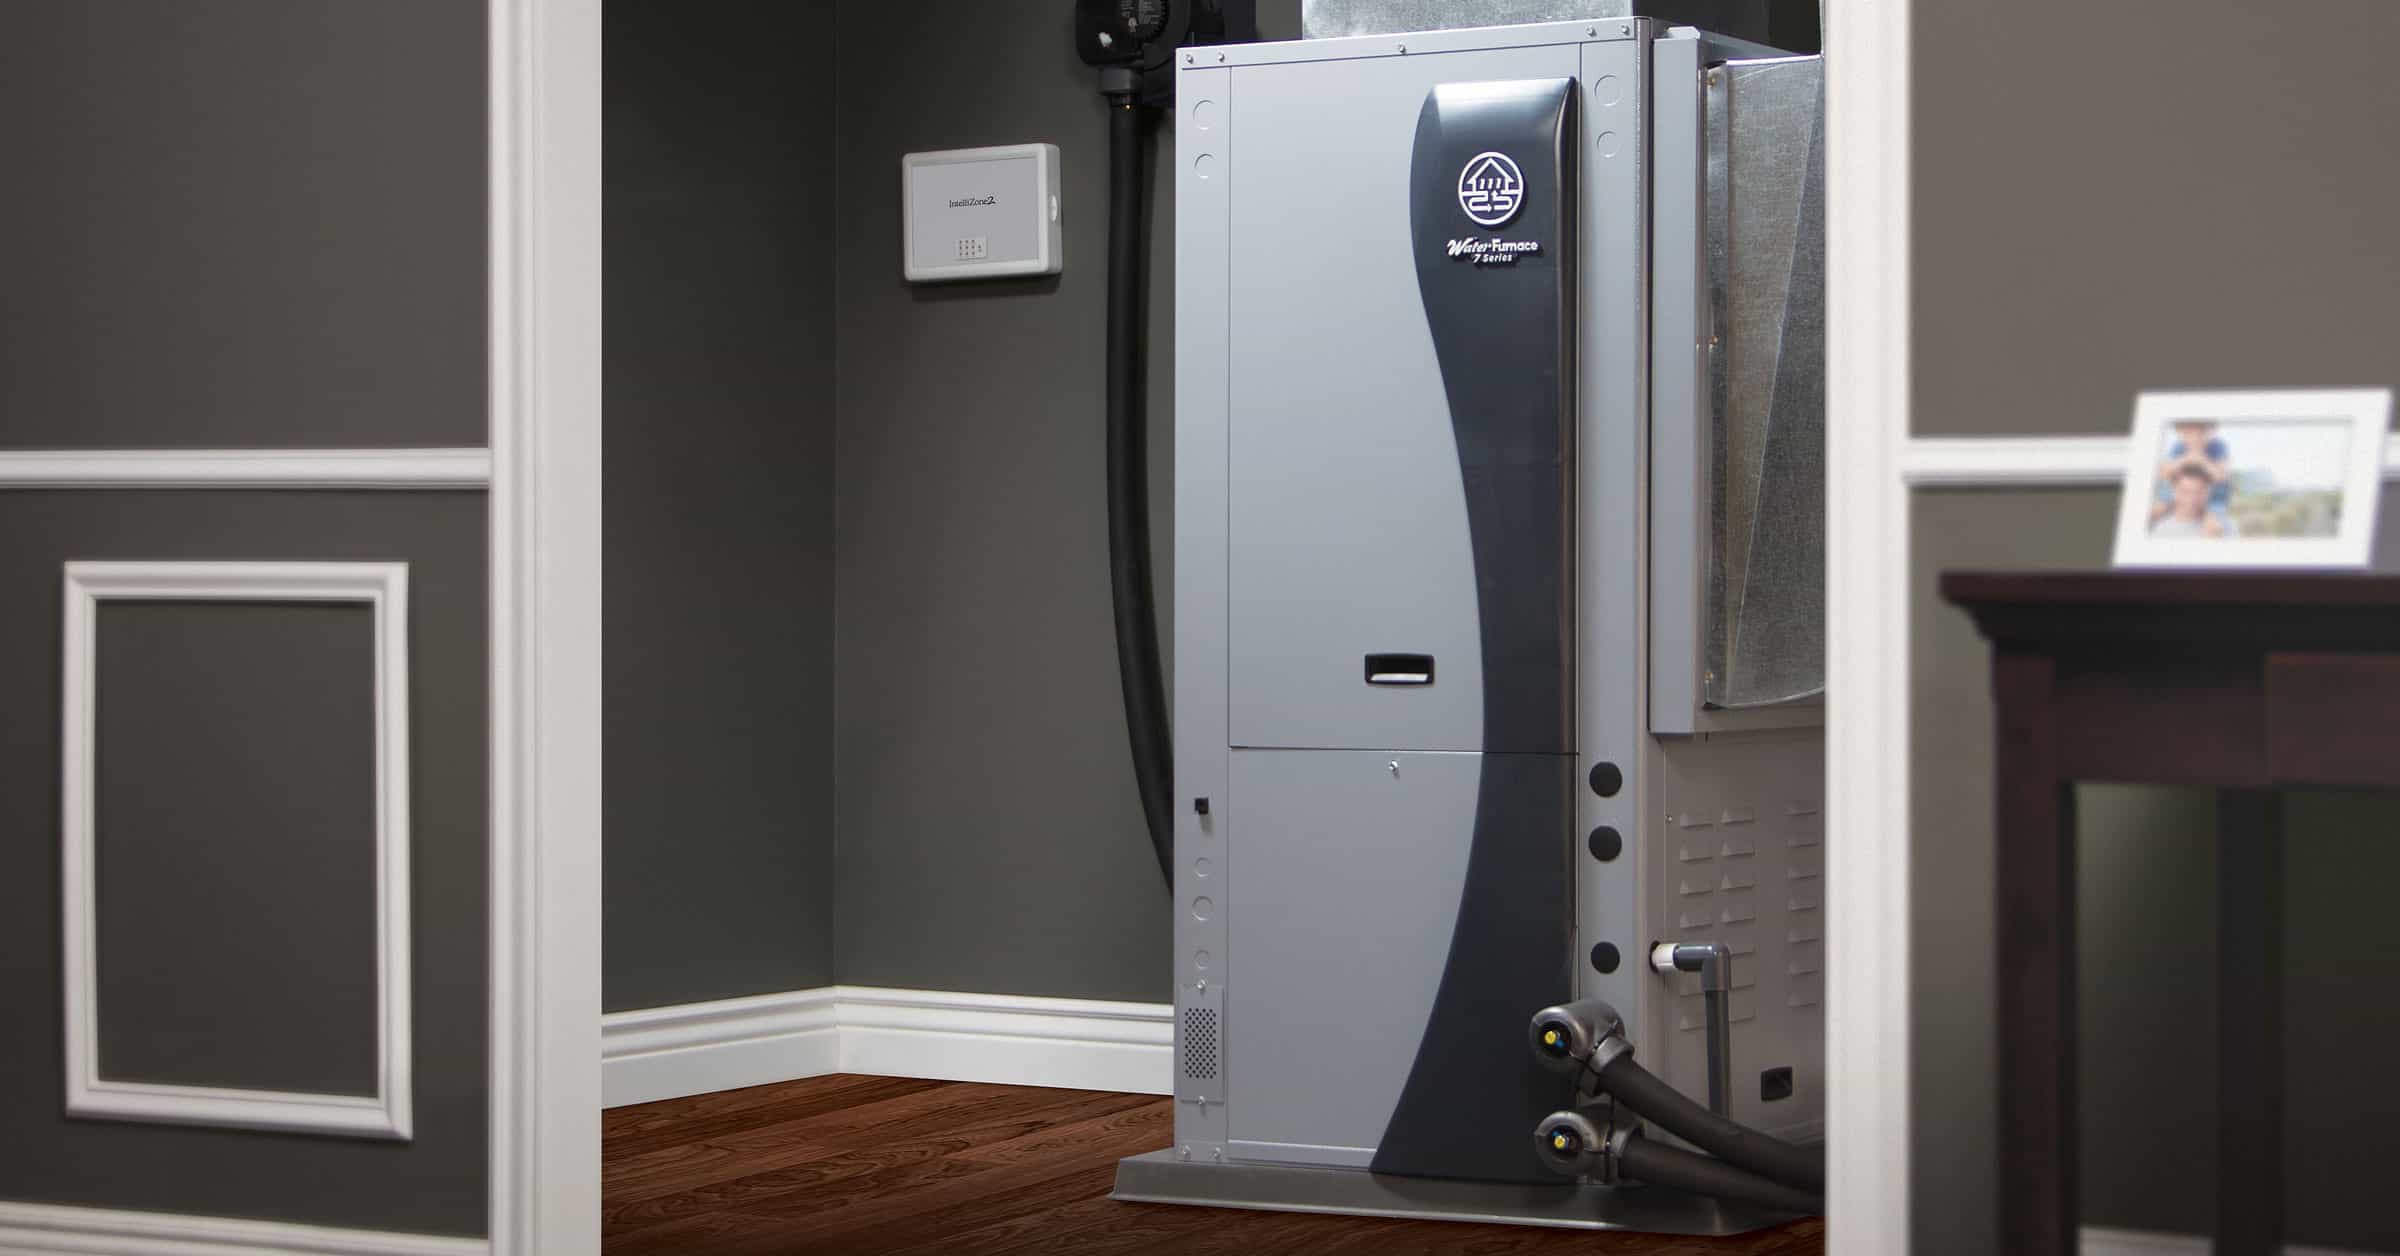
WaterFurnace geothermal systems are the “hottest thing going” today when it comes to cooling and heating your home, particularly for those who are environmentally conscious and want to enjoy a comfortable home year-round while conserving energy, and saving money.  If you aren’t familiar with the benefits of geothermal systems, Haley Mechanical wants to enlighten you about a few of the benefits.

Increased comfort.  Many homeowners in Ann Arbor, Ypsilanti, and surrounding areas experience cold spots in winter months and hot spots in their homes in summer months.  With a WaterFurnace geothermal system, comfortable air is evenly distributed throughout your home, eliminating hot or cold spots.  In winter months, you enjoy warm comfort without hot blasts you may experience with a traditional gas furnace.  In summer months, geothermal systems deliver air that is not only cool and refreshing but dehumidified as well.

Lower energy costs.  Geothermal systems work by combining energy that is stored below the ground with safe electric power, ultimately delivering five units of energy to cool and heat your home for every one unit of electrical energy.  This combination helps Michigan homeowners save an astounding amount of money – up to 70% on costs for hot water, cooling, and heating.

Dependable.  Traditional air conditioners and heat pumps have components installed outside, subjecting these components to rain, ice, extreme temperatures, and other elements that create wear and tear over time.  Geothermal units are installed inside, so they are protected from these elements and require less maintenance.

Quiet.  If you would enjoy quiet operation without the buzz and roar typically experienced with traditional air conditioners, you will love the WaterFurnace geothermal system as it is designed to run quietly.

Eco-friendly.  We have already mentioned geothermal systems are environmentally friendly, but even more, they emit no greenhouse gasses, carbon monoxide or dioxide, or other chemicals or poisons that contribute to air pollution.  When it comes to heating and cooling your home, a geothermal system is highly recommended by the EPA and Department of Energy.  There is no “greener” way to enjoy home comfort and reduced energy costs!

Ready to learn more about the WaterFurnace geothermal system?  Contact Haley Mechanical today.

How to Prevent Frozen Pipes in Your Ann Arbor Area Home

Picture of a house on a snowy day

Preventing Frozen Pipes in Your Southeast Michigan Home This Winter

Have you ever placed a can of soda in the freezer for a quick chill, then forgotten about it? If you have, you know what happens – it explodes. The same is true of water; when it freezes, it expands. When the unfortunate happens and water freezes in your pipes, they can burst, resulting in not only a mess, but serious damage.

The Real Reason Pipes Burst

While you may think water freezing and turning into ice causes a pipe to burst, this is not really the case. What actually happens is that when a pipe becomes completely blocked by ice in one spot, water continues to try to flow, which means continued freezing and even more expansion. Ultimately, water pressure is increased downstream, or in the area between the blockage and a closed faucet, which results in excessive water pressure. The area where the pipe actually bursts is not where you would assume, where the ice blockage is located, but rather in area with little or no ice. Typically there is not pressure build-up upstream of the ice blockage, because water can retreat back toward its source. This means that a break in a pipe usually isn’t caused by a build-up of water pressure, but by ice blockages. To prevent a burst pipe caused by water freezing and forming ice blockages, it’s recommended you protect pipes by insulating the pipes themselves, placing them within an insulated area of a building, or heating the pipes.

Regional Differences

Homeowners in the southern region are actually more susceptible to frozen pipes and a resulting burst, simply because pipes are often located in areas which are unprotected because of the warm climate. Pipes may be located outside of the building insulation, and because winters are typically not as cold as in northern regions, homeowners are less concerned or even unaware of freezing problems. Most who live in the south experience freezing problems only a time or two during winter months, if at all. Those who live in northern states are more aware of the potential of freezing temperatures causing problems. Most homes are built so that water pipes are located inside of the building insulation. This provides protection for the pipes when temperatures plummet. However, it’s important to keep in mind that when the weather is particularly frigid, pipes may still freeze and burst if holes exist in the structure which permit a stream of cold air to come into contact with water pipes. Pipes located in certain areas are more susceptible to freezing, including those located in crawl spaces, outside walls, and attics. This is particularly true when cracks or holes exist which allow cold outdoor air to flow across the pipes. According to the results of research conducted by the University of Illinois, wind chill is a big factor when it comes to pipes freezing and bursting. Just as cold wind causes a loss of body heat in humans, wind chill accelerates the freezing of water and thus ice blockages form. Additionally, the material pipes are constructed of and their size also plays a role in how quickly ice blockages will form. Most water pipes are composed of PVC or copper, however with sufficient insulation the risk of an ice blockage is relatively low. It’s also important to keep in mind that cold air may access pipes through holes in outside walls where telephone, cable or satellite lines or television lines come into the house.

When do Temperatures Pose a Threat of Freezing Pipes?

When should you be worried that your water pipes may freeze? Generally speaking, pipes which are not insulated or protected in some fashion can withstand temperatures to about 20 degrees F. This has been determined based upon research which found that in the south where water pipes are often not insulated or exposed to cold air, the onset of freezing occurred when temperatures outdoors dropped to 20 degrees F or below. A survey of more than 70 plumbers located in the south revealed that for the most part, homeowners began having problems with pipes bursting when temperatures plummeted into the teens. However, it’s important to note that pipes can freeze when temperatures are higher than 20 degrees F, depending on other factors such as how strong the winds are and whether pipes are directly exposed to cold temperatures.

Reducing the Risk of Ice Blockages in Water Pipes

How can you minimize the risk of water freezing in your pipes, resulting in a pipe burst? First, it’s important to understand that there is heat in water, which causes the water to freeze when that heat is transferred to air temperatures which are below freezing. While it sounds simple, the best way to avoid the problem is to make certain water pipes are not exposed to below-freezing temperatures.

Avoiding ice blockages in newer homes is easily accomplished, as proper placement of pipes (inside insulated areas, for example) can be implemented into the design. It’s best when possible not to run water pipes through crawl spaces, attics, outside walls, or other areas that make the pipes more susceptible to freezing. When possible, insulate pipes or have them run through conditioned spaces.

In older or existing homes, the solution may not be so easy. There may be situations where your plumber can re-route those pipes which are most at risk of ice blockages. When this is not practical, water pipes should be properly wrapped or fitted with insulation sleeves, ensuring there are no gaps which may expose any section of the pipe to sub-freezing temperatures. You can find the right type of insulation in most home supply, hardware, or plumbing stores.

Check your home for any holes or cracks which may be present in foundations or outside walls where water pipes run. When you find any cracks, gaps, or areas where cold air may come in contact with pipes, seal them with caulk. When temperatures drop to the point you worry about freezing pipes, leave cabinet doors underneath sinks in the bath and kitchen open so warm air can reach the pipes. There are also electric heating tapes and cables which can be run along pipes to prevent freezing, however these must be used with extreme caution as there is a risk of fire if manufacturer’s instructions are not followed carefully.

Letting a faucet drip can also prevent a busted pipe, as an open faucet provides relief from the built-up pressure that builds when an ice blockage forms. A very slight drip will prevent build up of pressure in those pipes most vulnerable to freezing.

Suspect a water pipe has frozen?

Call a plumber immediately if you turn on a faucet and not water runs. Never attempt to thaw a frozen pipe yourself with an open flame, as this could potentially start a fire or cause damage to the pipe. Turn the water off at the main shut-off valve should a pipe burst, and allow faucets to remain open until you or the plumber completes any necessary repairs. A hair dryer may be effective in thawing out the pipe; be sure to begin close to the faucet end, working your way toward the coldest section of pipe.

Going on vacation?

If you plan to be away from home for a lengthy period of time during the coldest winter months, consider the temperature you set your heating on. While you don’t want your furnace to run the entire time you are away, keeping it set a little higher could prevent your pipes from freezing and bursting. Also, consider draining the water system, so that there is no water in the pipes to freeze. This can be accomplished by shutting off the main water valve, then opening every faucet or water fixture until the water ceases to run (both hot and cold lines).

Cleaning the Toilet Tank? Yes – 9 Tips to Make the Job Easier

Toilet cleaning supplies

As a homeowner, the thought of cleaning your toilet tank has probably never crossed your mind. Sure, you clean the bowl – but the tank? The fact is, southeast Michigan homeowners should clean the tank twice each year to rid the tank of germs and dirt. For most people, the only time they see the inside of the tank is when there is a problem. Make it a point to sanitize your toilet tank – here’s how.

Gain access by turning the water to the toilet off

Of course, you cannot thoroughly clean the tank if it is filled with water, so turn off the toilet’s water supply using the valve located below the tank. Flush to drain the water out of the tank.

Make cleaning as easy as possible

The easiest way to thoroughly clean the toilet tank is to spray it down with a disinfectant cleaning spray such as Lysol or 409. Using a disinfectant spray will loosen much of the build-up, and kill most of the bacteria and germs. Let the solution work for about 15 minutes before you start cleaning.

Use a toilet brush for cleaning

You may be tempted to use a sponge or cloth, but a toilet brush is the best way to thoroughly clean inside the tank. The long handle gives you easy reach, and bristles give more scrubbing power than a cloth. Also, the shape and size of a toilet brush makes it ideal for cleaning around flushing components and getting into the corners.

Cleaning tough mineral deposits

You may think mineral deposits present more of a challenge, and they can – but cleaning them away isn’t hard. Drain the tank as described above, then use vinegar to fill the tank to just above the overflow tube, just below the top of the tank. If you don’t have any vinegar on hand, you can also use regular cola to remove mineral deposits. Whichever you choose, let it sit overnight before flushing. If any mineral deposits remain, scrub away with the toilet brush.

Pumice stone

If your toilet tank is manufactured of vitreous china, you can scrub away mineral deposits using a pumice stone. Do not use on toilets made of other materials.

Removing mildew or rust

Toilet tanks that accumulate mildew can be problematic. Removed the mildew as much as possible when cleaning, then place a bleach tablet in the tank. It may be necessary to install a water purification system if mildew continues to reappear.

For rust stains, the best solution is to use a rust remover designed for use in toilets or laundry. These products can usually be purchased from a hardware store or your local supermarket in the laundry detergent section.

Keeping your clean toilet tank clean

Once you have it sparkling clean, how do you keep your toilet tank as clean as possible until time for the next cleaning? Use bleach tablets that are designed to be placed inside the tank. This will help keep it clean and kill germs.

Part replacement

While your tank is empty and clean is the best time to inspect the components for wear and tear. Any parts that look excessively worn should be replaced, and parts in the flushing apparatus oiled to make sure your toilet operates smoothly and efficiently.

Avoid automatic toilet bowl cleaners designed to be placed in the tank

There are various products designed to keep the toilet bowl clean between cleanings that are to be dropped into the tank. Do not use these products, as the harsh chemicals in the cleaners can cause the rubber flapper valve to rot – leaving you with a leak.

Have questions about cleaning your toilet tank? Give Haley Mechanical a call today. Proudly serving Dexter, Ann Arbor, Howell, Ypsilanti, Plymouth, Brighton, and other areas of southeast Michigan for more than 15 years.

5 Tips That May Save You From Buying a New Water Heater

Bathroom in Ann Arbor, Michigan

Water Heater Not Working Efficiently? 5 Tips That Could Prevent Replacement

If you’re an Ann Arbor area homeowner who feels it may be time to replace your water heater, there are a few things you can do that may improve its performance before you shell out your hard-earned money. Maybe it seems that it’s taking the water longer than usual to heat up, or you’ve had an unwelcome surprise when the shower water suddenly turns cold.

Before you replace, give the following 5 tactics a try:

  • Perform a quick maintenance check. It could be something as simple as a pilot light or burner not working. Make sure your thermostat is functioning properly and considering flushing out the system.
  • Sediment that settles in the tank could not only damage it but interfere with performance.
  • Seal up any drafts. When your water heater is located in an unheated space such as a basement, the cold drafts can make it harder for your water heater to do its job. Seal around window frames and other sources of cold air with caulking or weather stripping.
  • Consider an insulating blanket. A water heater that’s warm to the touch is not as energy efficient as it could be. There are insulating blankets which are specifically designed for water heaters – but be sure to follow instructions carefully, particularly if your water heater is fired by gas or oil.
  • Inspect the dip tube. Dip tubes, especially those in a water heater that’s older, can break or crack. This tube is what allows cold water to enter at the bottom of your water heater’s tank while the water at the top remains hot. A crack or break could be letting cold water in, which means what should be hot water is only warm.
  • Insulate your pipes. When water pipes are not insulated, they are cold – which means the water running from your water heater to your shower, sink, dishwasher, etc. could be cooling before it reaches its destination. Install pre-split foam pipe insulation tubes on the water pipes that connect to the tank. At a minimum, insulate the first six feet of both the cold and hot water pipes.

Try the tips above, and you may be surprised to find that you won’t have to replace your water heater after all!

At Haley Mechanical, our job is to keep southeast Michigan homeowners’ homes running smoothly, whether you have problems with your water heater, air conditioner, or other equipment. Live in Ann Arbor, Dexter, Ypsilanti or surrounding communities and have questions about your water heater? Give us a call today.

How to Prevent Mineral Buildup in Your Humidifier

Beautiful Condo with Wood Flooring

Indoor air that’s too dry or lacks moisture can result in a whole host of problems, not only in terms of your health but your home. Many Southeast Michigan homeowners use humidifiers to achieve the right humidity level, which helps prevent sore throats, respiratory problems, static electricity, and other problems. As with other equipment used in your home, proper maintenance is key to proper functioning.

When limescale or calcium build up in your humidifier, it will prevent it from functioning properly. Thankfully there are various things you can do to help avoid the buildup of minerals in your humidifier.

Tips for preventing mineral building in your humidifier

  • Use distilled water and avoid tap water. Distilled water that’s treated to destroy impurities is recommended for filling your humidifier, as regular tap water is loaded with impurities and minerals that can result in the buildup.
  • Clean your humidifier frequently. Regular cleaning will help ensure your unit stays clean and help avoid mineral buildup.
  • After each use, empty the water reservoir. Most people know that standing water can stagnate, and that moisture is a great breeding ground for mold and mildew. To ensure mold doesn’t migrate to other areas of your humidifier and avoid buildup, empty the water after use.

What about mineral build up that already exists?

If you are noticing signs of mineral buildup in your humidifier, undiluted white vinegar, and a scrubbing brush or toothbrush are highly effective for dissolving lime and calcium deposits after you have disassembled your unit.

If the buildup is substantial and you have more serious calcium or lime deposits, use white vinegar to thoroughly soak the area for a few hours or even overnight depending on how tough the deposits appear to be. After time has elapsed, rinse with distilled water and use a clean cloth to wipe away residue.

Need other ideas on how to avoid calcium and lime deposits or mineral buildup in your humidifier? Contact the experts at Haley Mechanical, proudly serving residents in Ann Arbor and surrounding areas in SE Michigan.

Furnace Not Working? Perhaps it’s Time to Change Thermostat Batteries

Picture of batteries

Recently, we’ve been receiving numerous phone calls from southeast Michigan homeowners regarding furnaces that are not working. What we’ve found is that in many cases, it’s simply a thermostat issue – dead batteries.

If you have a digital thermostat, it may be the batteries that’s causing the problem, particularly if your thermostat has warned you about low batteries. The process if fairly straightforward, a task you can likely take care of yourself.

How can you change the batteries? Depending on the brand, here are two recommendations:

If your thermostat has an external battery compartment. Here’s how you change the batteries.

  • Look straight on at your thermostat; you will see a place where you can press down to release the compartment on the top right side of the thermostat.
  • Press down at this area, then tilt the battery compartment to the right; this will allow you to remove the plastic compartment. Change the batteries out, and you are ready to put the compartment back in place.
  • To replace the compartment, begin with the side where you put the batteries in (the open side of the compartment) facing toward the wall. Insert the compartment into the slot holding it at a 45-degree angle. Tilt the compartment fully back to the left; when inserted properly, you will hear it snap back in place. The screen should come on at this point.

While your thermostat settings should have been saved, double check to ensure they are still set.

If your thermostat does not have an external battery compartment

In some thermostats, the thermostat faceplate must be removed to locate the batteries.

  • The majority of thermostats with no external battery compartment release from the bottom of the wall plate first, then the top. Carefully pull the thermostat from the wall plate while holding it firmly in place. Depending on your thermostat, there may be screws that need to be loosened, or there may be a tab at the bottom you will need to press in. Look for screws if it feels like you are having to force it.
  • If you can see the batteries either in the thermostat or on the wall plate and the wall plate remains attached to the wall, you are on the right track.
  • After replacing the batteries, snap the thermostat back into place, taking care not to force it. The thermostat has pins on the back you want to avoid bending or breaking!

Replacing the batteries in a digital thermostat is fairly easy, however, if you have problems don’t hesitate to contact us at Haley Mechanical. After replacing the batteries, if your furnace still doesn’t operate properly give heating repair experts call at 734-424-9170!

Furnace Not Working? Try These Things Before Calling in the Pros

Picture of a furnace filter

Anyone who lives in Ann Arbor or SE Michigan knows temperatures often get downright frigid during the winter months. The last thing you want is to come home to a house that’s freezing, only to find the temperature indoors is colder than where you set the thermostat.  Before you pick up the phone to call in the pros, try these tips!

Make sure the furnace is getting power.  Check to make sure the furnace is turned on, check the circuit breaker, and look at the fuse box.  You would be surprised to know the number of times technicians have gone out on a call only to find a blown fuse or tripped breaker!

Change the filter.  Sounds too simple to be the fix, doesn’t it?  When the air filter gets clogged with all of the dust, dander, pollen, dirt, and other debris it’s protecting your family from, it makes airflow difficult.  This could be the problem if your furnace does come on, but shuts off before your home warms up to the temperature you set the thermostat on.  Changing your filter regularly often prevents issues with the furnace.

Check to ensure the pilot light is lit/gas turned on.  The gas valve must be turned on for your gas furnace to get the fuel it needs to work.  If your furnace is older than 20 years, be sure to light the pilot light.

Take a look at the thermostat.  For your heat to come on, it must be set to the “heat” position and the temperature set to your desired point, but one that’s higher than the current temperature in the room.  Check the battery if you have a thermostat that operates on one, and the scheduled times if you have a programmable thermostat.  It’s a good idea to replace the thermostat battery at the beginning of the heating season.

Check air registers, vents, grilles, and ducts.  You will want to check the air registers and vents inside your home first to ensure they aren’t blocked by anything such as furniture or rugs.  Once you determine there is nothing restricting airflow, take a look at the ducts to see if there is a build-up of dust, dirt, or other debris. You will also want to see if there may be a leaky duct that is allowing the heat to escape before it comes into your home.

Inspect your furnace for dirt and corrosion.  After turning the power switch off, remove the front panels and inspect for dirt, dust, spider webs, corrosion, or rust on components, anything that could be causing problems.  Use a vacuum or compressed air to clean away the debris and call a technician who can replace any corroded parts.

Check outside exhaust and intake.  Airflow issues are often caused by debris, leaves, or even birds.  If you are comfortable doing so yourself, clear away any blockages; if not, call in a professional.

Check for a clogged drain line.  Flue gas condensate is carried away with drain lines in both boilers and high-efficiency furnaces. Your furnace will not function if the drain line is clogged with mold, dirt, or sediment, so if you think this is the problem, flush out the drain line.

Turn off the furnace to reset it.  The majority of newer furnaces equipped with electronic ignitions have a lockout mode should the ignition sequence fail.  Rather than waiting for the ignition to reset on its own, turn the furnace off, wait for a minute or two, and turn it back to the “on” position.  Low gas pressure and electrical brownouts/blackouts can result in lockouts, which may be your problem if any of these have occurred.

Have an HVAC technician come and inspect/service your furnace. Sometimes you can’t resolve the issue yourself, or you may not feel comfortable performing some of these tasks.  In this event, call in our Ann Arbor HVAC professionals to ensure a warm, cozy home all winter long!

HVAC Maintenance Helps Improve Indoor Air Quality

Lady Relaxing on Couch

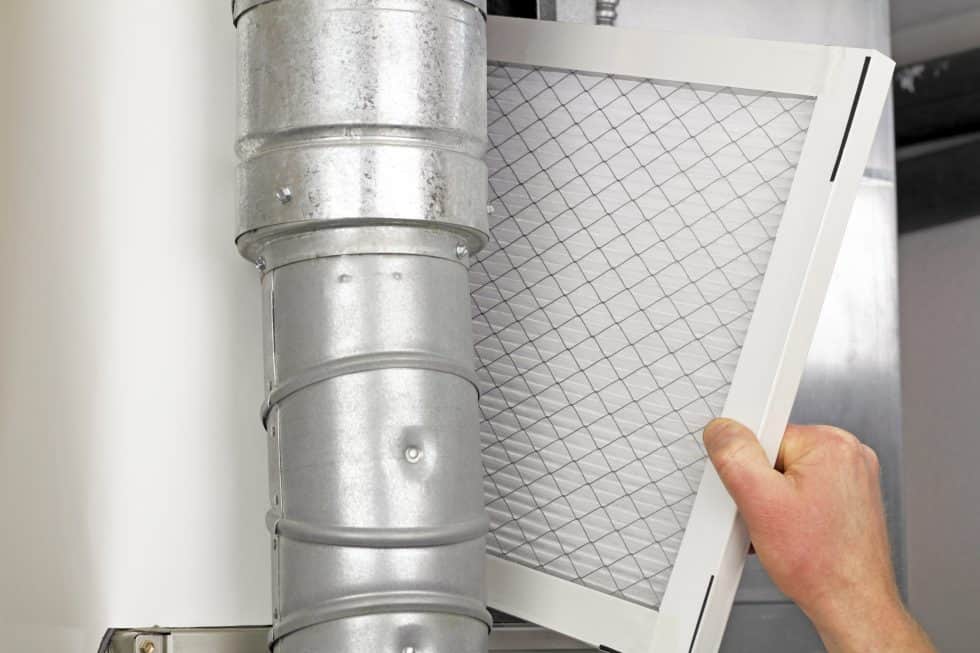
Is the air inside your Southeast Michigan home as clean and healthy as it could be?  Regular HVAC maintenance makes a big difference – and when you ignore your heating/cooling system, it can result in health or respiratory issues.  How can you ensure the air inside your home is a clean as possible?  We have a few tips.

Check/replace the filter each month.  The filter is the component of your HVAC system that air circulates through first, capturing dust, dirt, pollen and other irritants.  Check your filter every month and change if it’s dirty, as a clean filter equals cleaner indoor air.

Have the ducts cleaned.  In most cases, if you’re vigilant about changing the filter, the ducts won’t get too dusty or dirty.  However, if you’ve neglected to change the filter over a period of months, having the ducts cleaned by one of our professional technicians will ensure cleaner air circulating throughout your SE Michigan home with less dust or other debris.

Choose a filter with a high MERV rating.  Pleated filters with a MERV (minimum efficiency reporting value) of 5 to 8 is recommended to filter out irritating dust and debris.  Filters with a MERV rating of higher than 8 are not recommended as they can impact the efficiency of your HVAC system.  Cheaper fiberglass filters common in many homes and rated between 1 and 4 are not effective against the infiltration of pet dander, dust mite waste, or other common airborne contaminants.

HVAC maintenance and repair is critical to the health and well-being of your family, ensuring the air you breathe inside your Ann Arbor home is the freshest air possible.  A clean system also impacts efficiency, which affects how much you pay for heating or cooling.  Give Haley Mechanical a call today!

Financing available

Make no payments until 2023 and pay as little as $132 a month when you finance a new Lennox system. Talk to a comfort advisor today!